
OO Scale 1970s Office Building – 3D Print
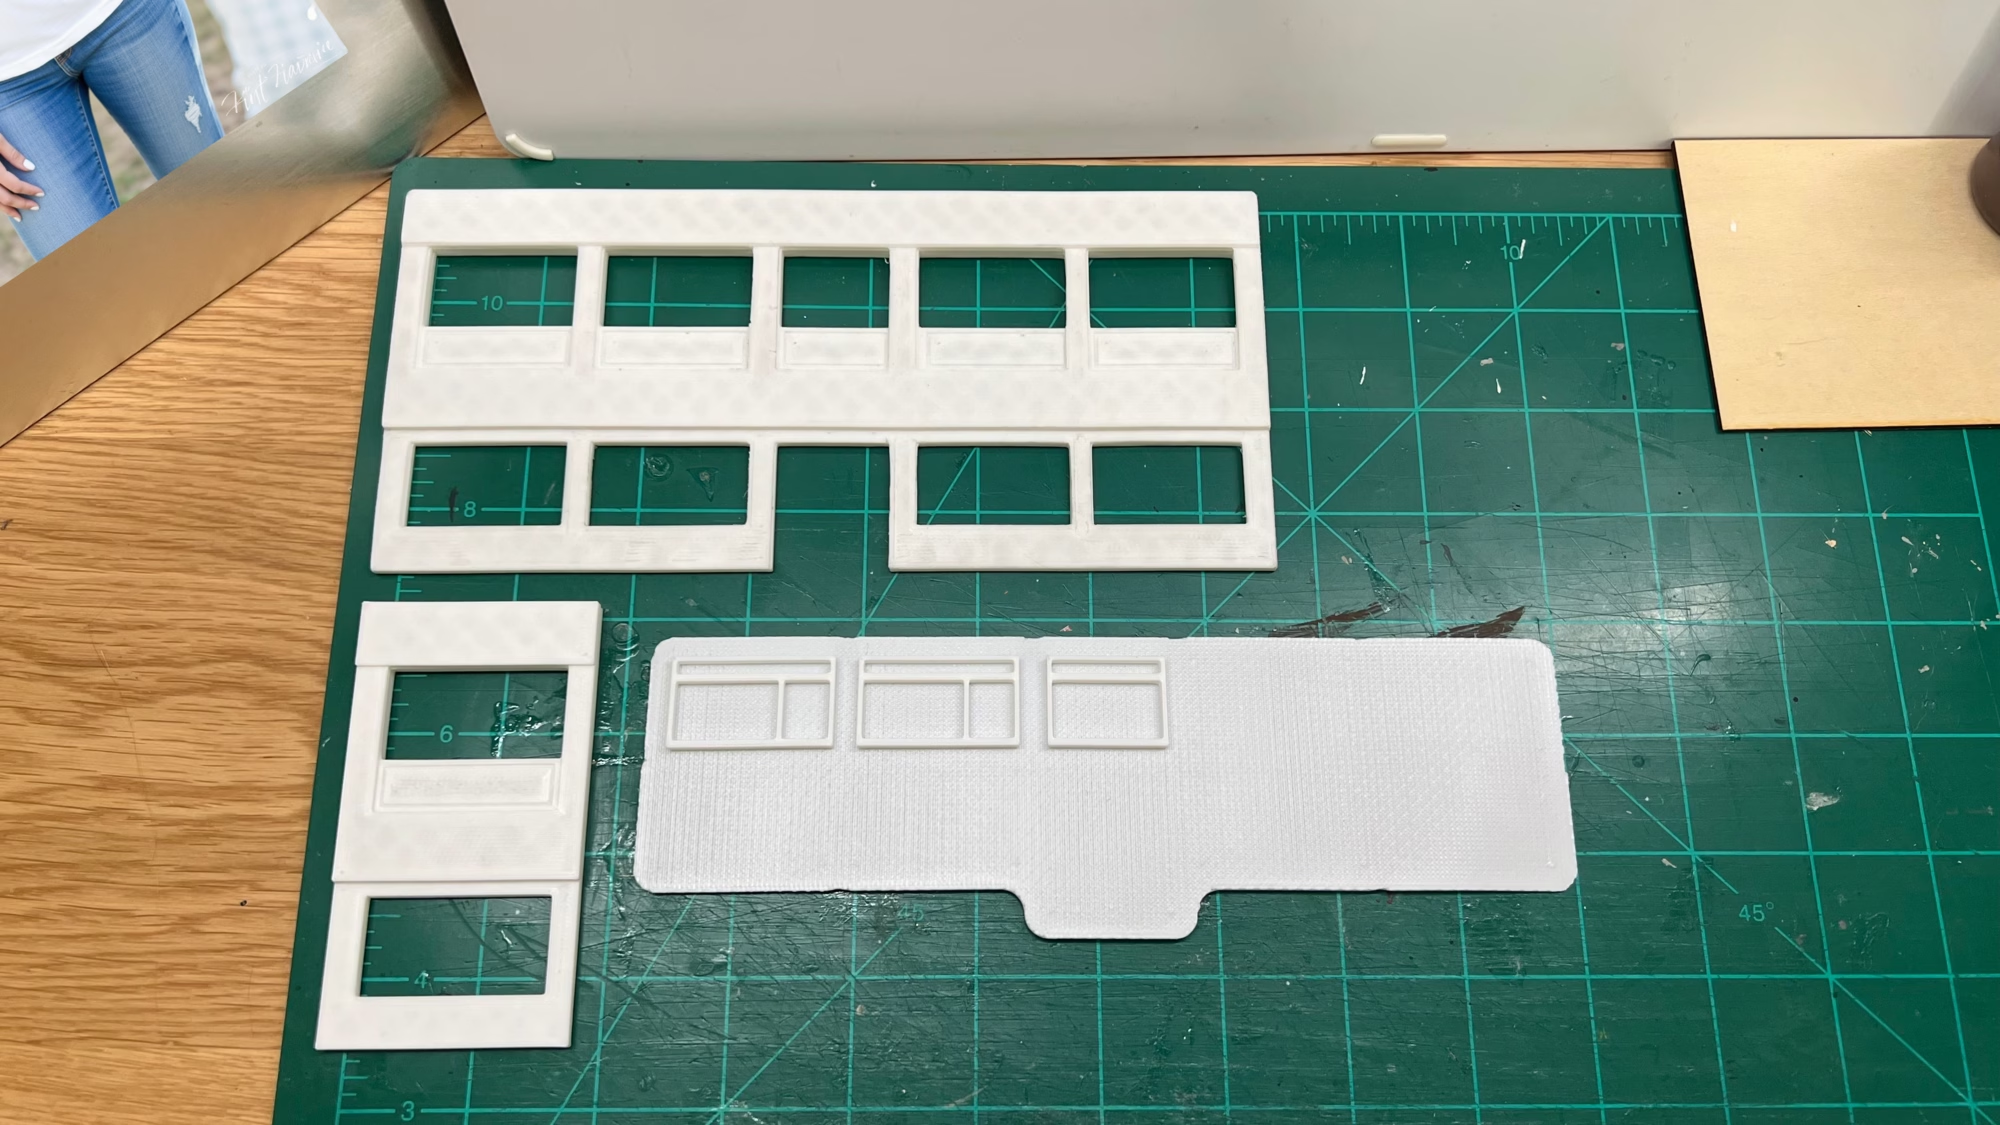
Yard Office Building This type of building was common all over the UK. Looking at these buildings, It was the large windows that always struck me as odd. Being a cold country the heat loss through those windows must have been horrific in the winter, this was way before double glazing was common. I do remember that often these offices would have 15ft (4.5m) hot water radiators underneath the window that were scolding hot to the touch. Ahhh, the joys of England in the winter…. Painting the insides of the model black to stop “light bleed” In the image below I’ve fitted the windows and I’m toying with the idea of painting part of the building “brown” What was it about the 1970s and brown? I still need to sand down the model after its 3D print and tidy up the paint edges.
OO Scale 3D Printed Wagons

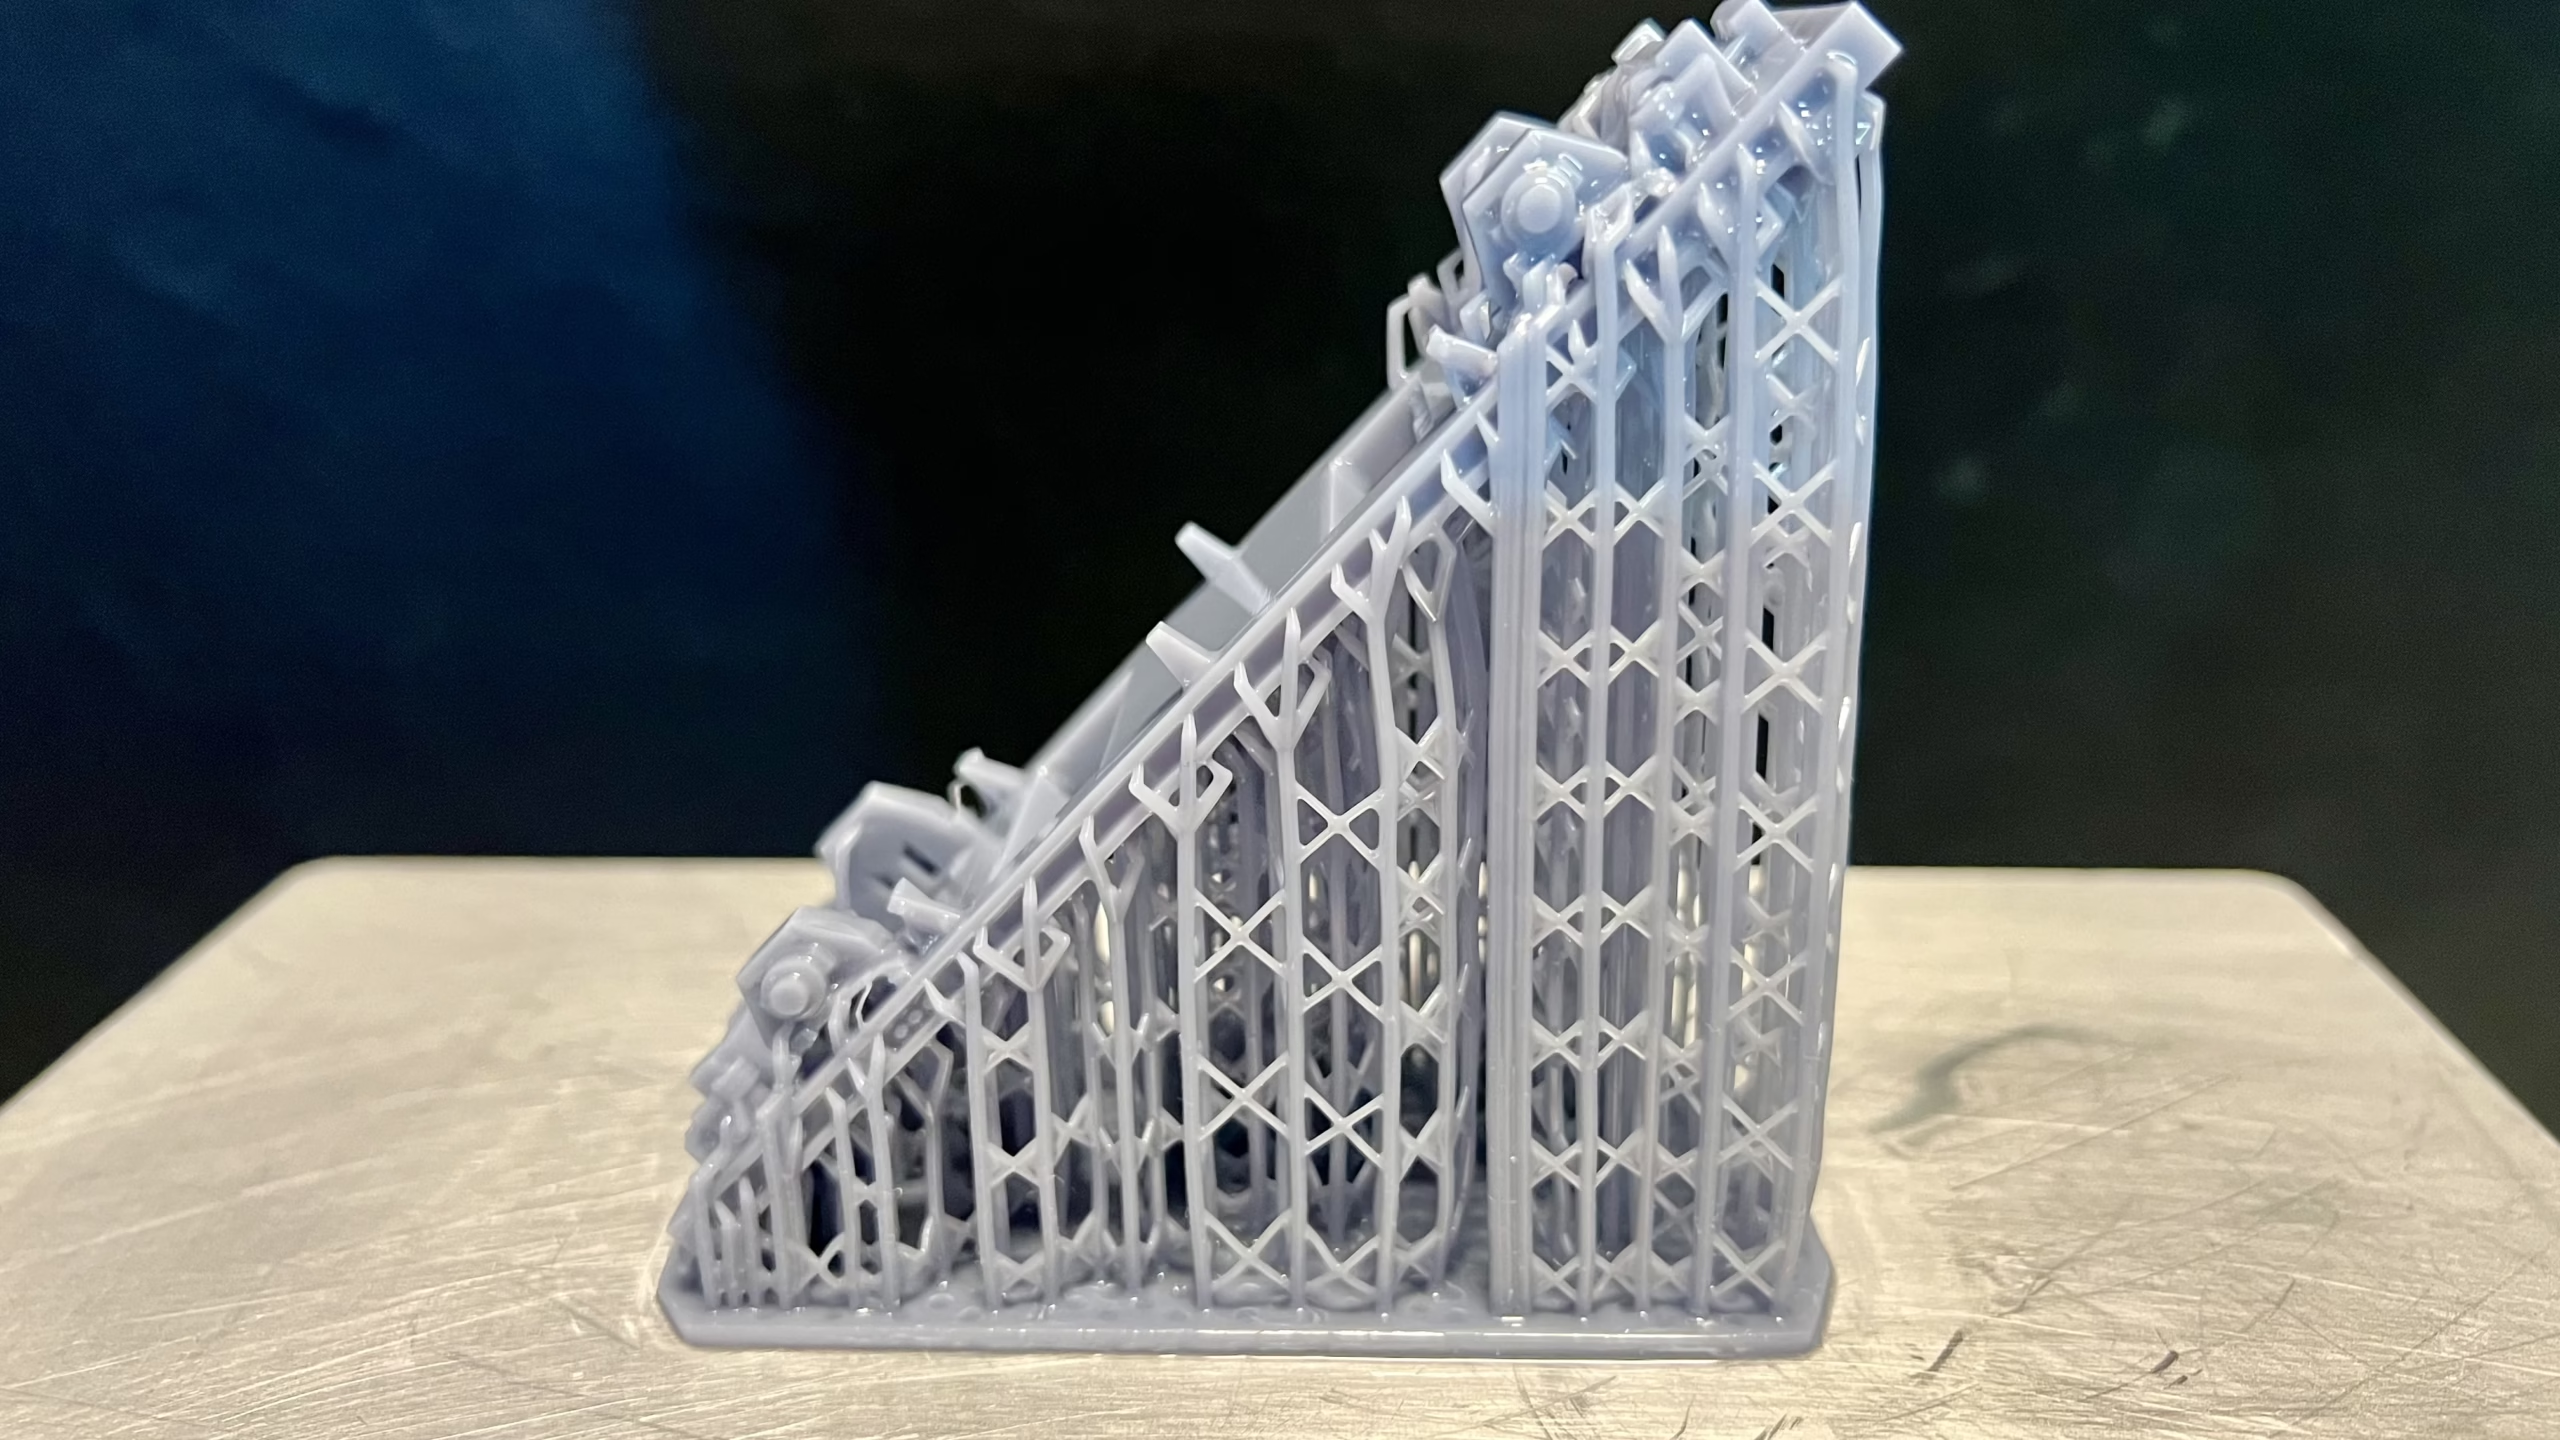
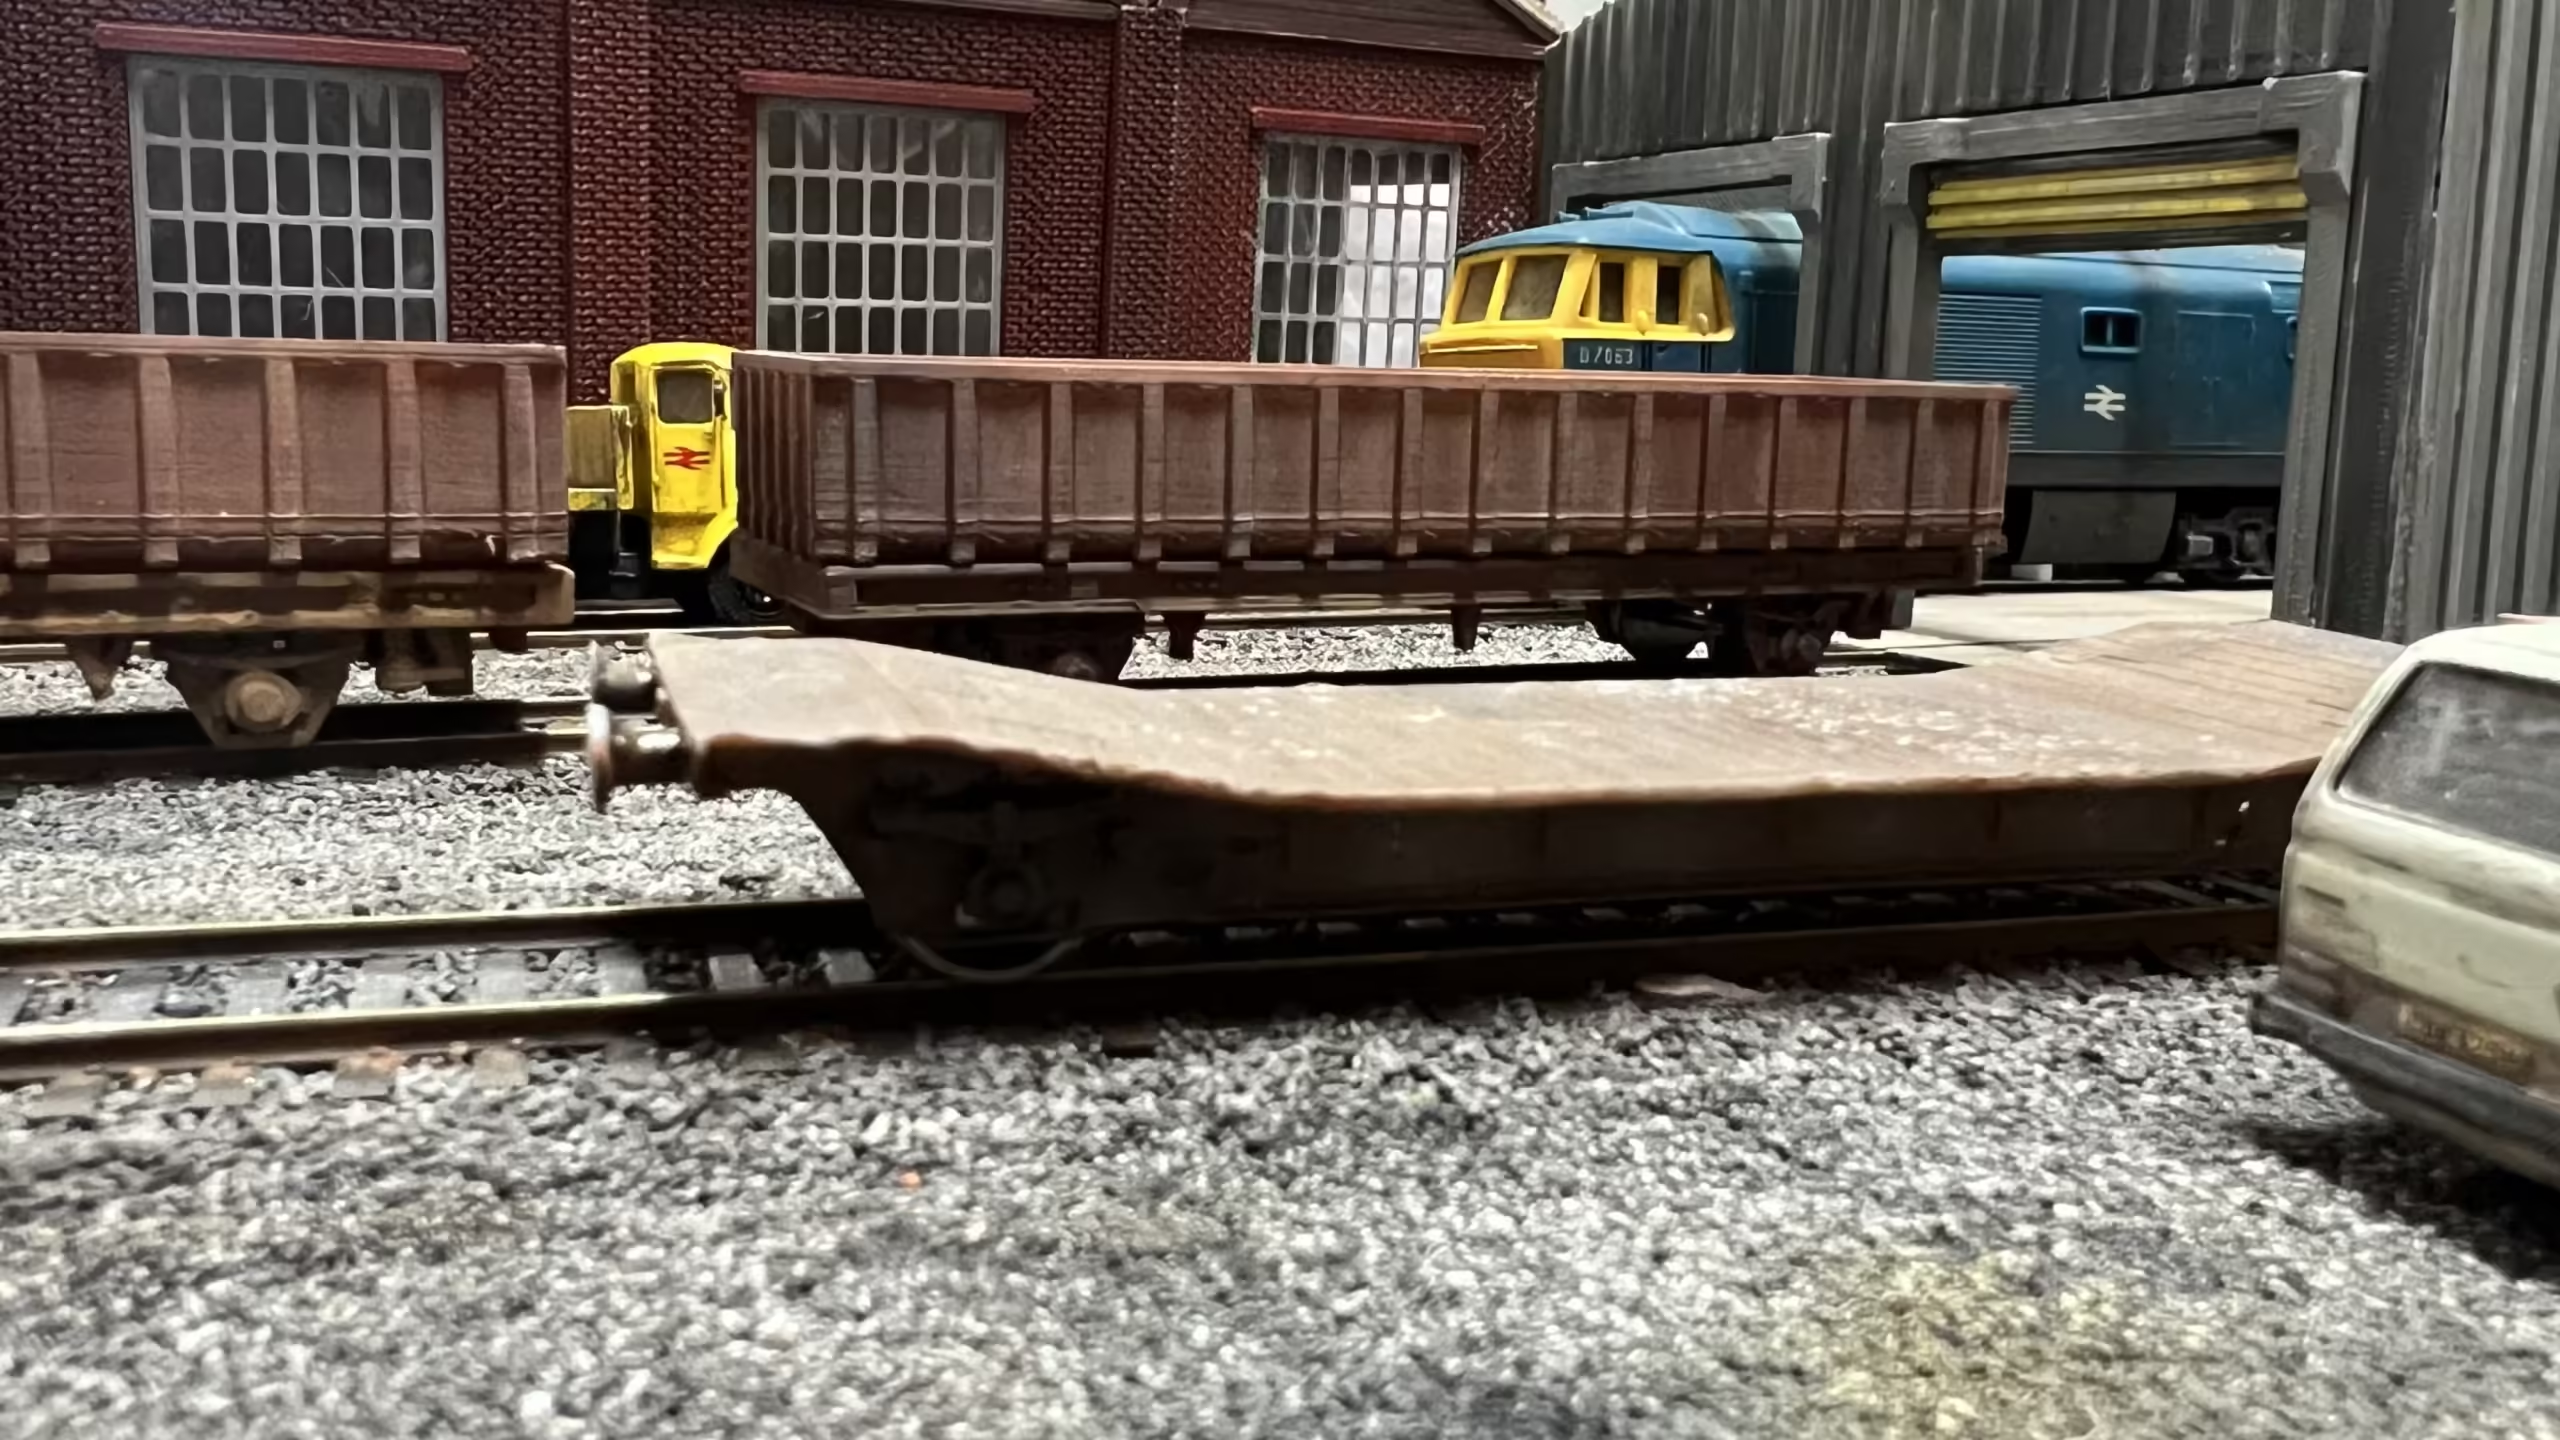
A 3D Printing Experiment I was browsing the Rails of Sheffield website and was reeling at the eye-watering prices of the wagons when I began to wonder if I could 3D print a reasonably acceptable model. A quick browse of Cults.com and Yeggi.com turned up quite a few OO scale 3D printed wagons. An hour or so later I had a couple being printed out. This is a “Gannet” Ballast Hopper Wagon that I found on Thingiverse, credit for the original 3D print design goes to “Ironmink” Next, we have a LowMac also from “Ironmink” on Thingiverse. This was also printed on the Photon M5s resin printer. Here it is with the buffers added, yes, they were 3D printed on the resin printer. The camera is brutally honest when zoomed in this much. I wanted a suitable “load” to put on the LowMacs. A quick trawl through the 3D Printing sites and I found this. It’s meant to be part of a transformer, but I suppose it could be storage tanks. A quick spray of silver from the airbrush. Finally, we have a 7 plank wagon that I found on Thingiverse, credit for the original 3D print design goes to “Ockey Mountain Railway”. I printed this on the Elegoo FDM printer. Here it is during some painting and weathering. Here is the top and the chassis. As you can see the buffers didn’t come out great on the filament printer. I will probably re-print those on the resin printer, but on the whole I think it came out pretty well. It used the equivalent of about £1.60 of filament, so a rake of 10 is around £10.60 as opposed to £10.00 per wagon which is the cheapest I could find on Rails of Sheffield. Filament vs Resin It’s a given fact that Resin 3D printing gives more detailed results than filament, but I wanted to see just how much different they were. I created my own version of a FGA Freightliner wagon. ..and sent the same file to my Elegoo filament 3D printer and my Photon Resin 3D printer. It took 12 hours for the resin printer to finish. …and 2 hours for the Filament 3D printer to finish. The difference is huge. I added “supports” to the filament print and by the time I had taken those off, the rough edges were awful. It made the print unusable. However, an earlier 3D print I did of an FGA Wagon on the filament printer came out well. The difference was the level of detail and the fact that I could print this one upside down, which meant no supports. 3D Printed Trucks/Bogies 3D printing the Bogies/Trucks has been a bugger. This is a great example of a compromise between scale/prototype accuracy and the strength needed for 3D printing. I printed a fantastically accurate bogie, but it was too delicate and snapped. I’ve now purchased every 3D print bogie I could find on all the websites, (including the free ones) and I’m not happy with any of them. OO Scale Coalfish Wagon 3D Print As my journey into 3D printing OO scale wagons continues, using images and information online, I created my own version of a HMA “Coalfish” wagon. 4 hours later, my Anycubic resin 3D printer turned out this… I’m trying out a new resin that is flexible. I’m really pleased with this as it makes installing the wheel sets much easier when there is a bit of “give” in the plastic. I ruined 2 chassis’ before I switched to the new resin. The pictures below are a bit busy but you can see how the chassis and bodies came out after airbrushing and weathering. (the Lowmac in the foreground is also 3D printed.) I know they aren’t as detailed as the £30 model, but that’s not the point of my exercise, which was, can I produce a reasonably accurate and visually pleasing model of an OO Scale 3D Printed Wagon? Personally, I think the answer is YES. I still need to tweak the weathering a little more and fit the buffers, brake levers etc. but I think they came out pretty well. If I create other OO Scale 3D printed wagons, I’ll add them here. Thanks for reading.
OO Scale Maintenance Shed
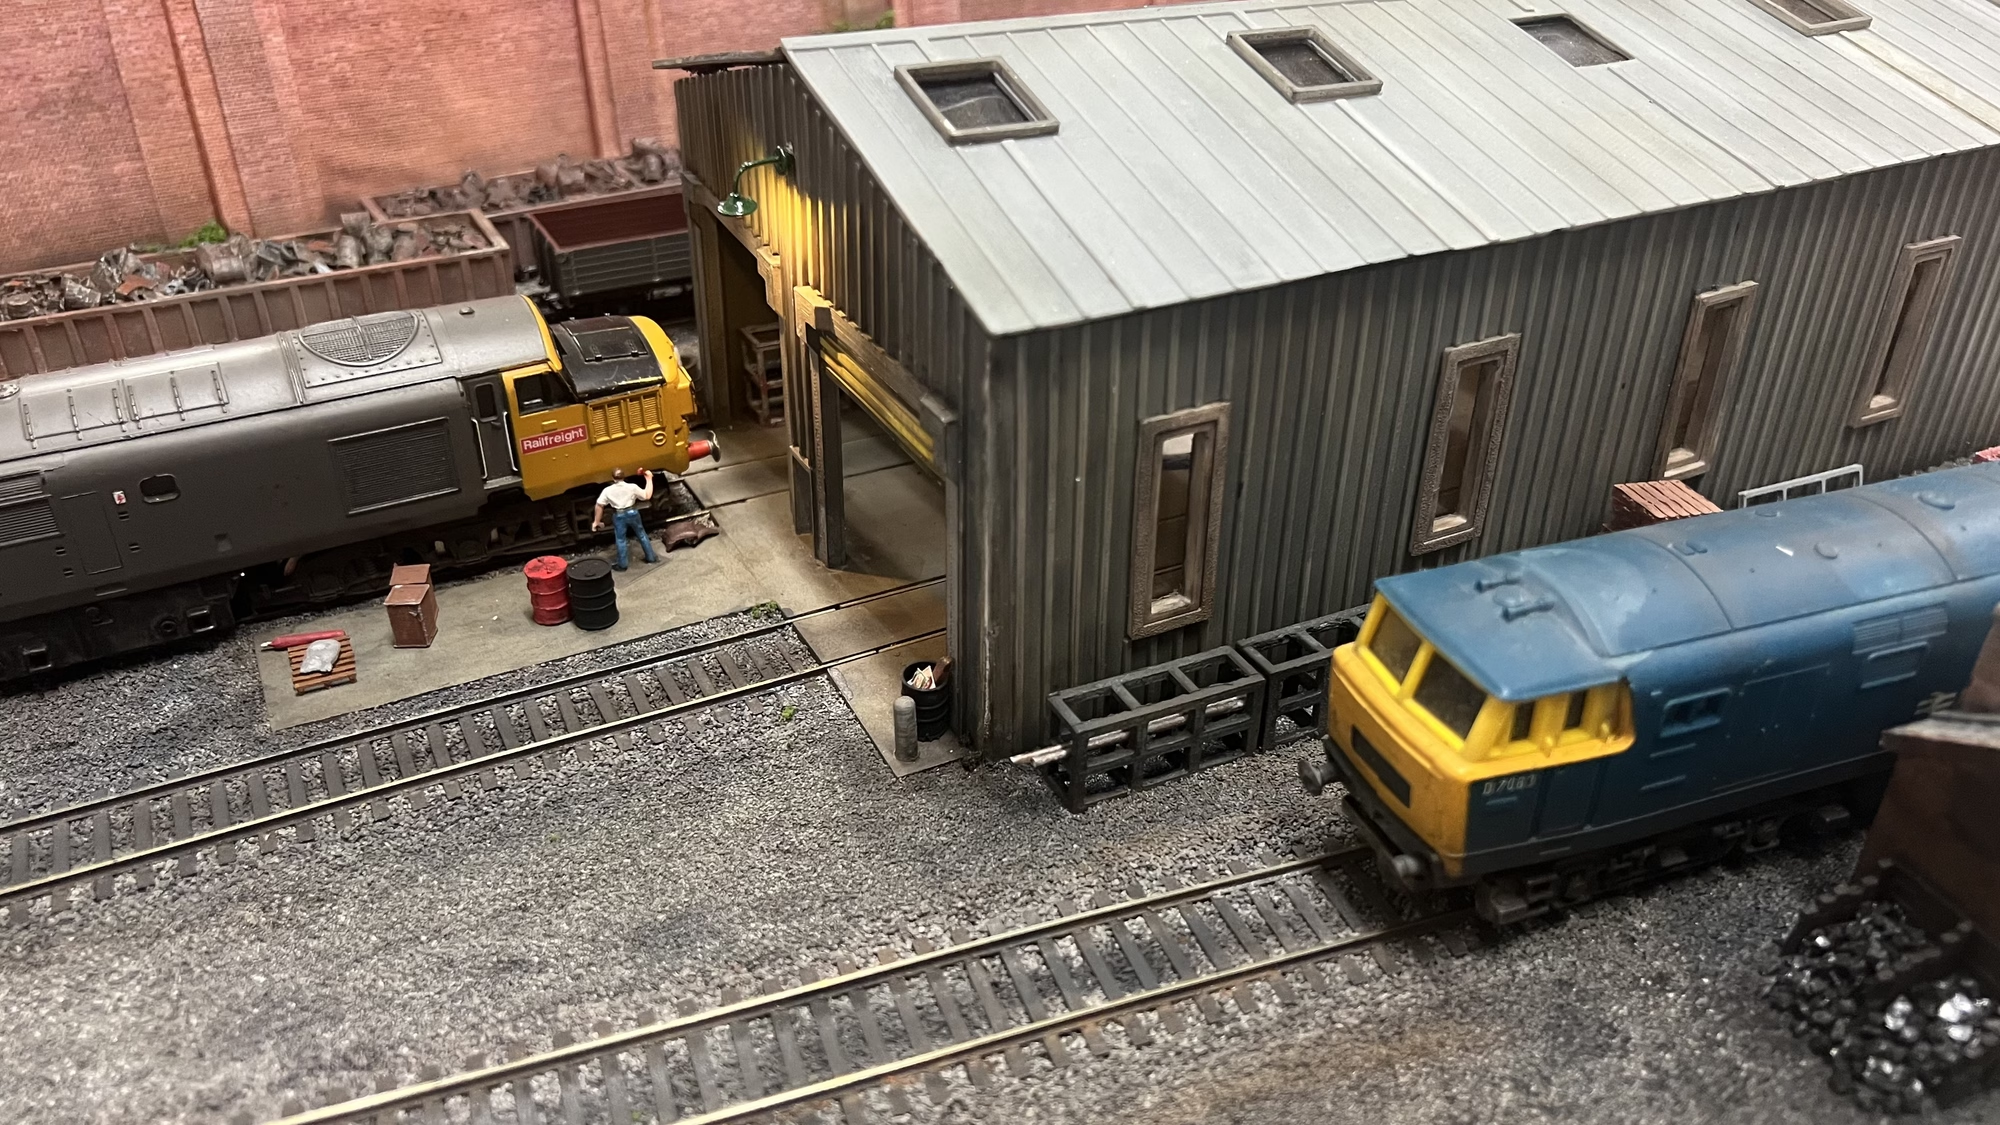
As I started to build out the Diorama, I decided I wanted something with some height and depth to give some perspective. After a mooch around the Cults.com website that lists 3D printing items. I landed on this. Credit for this design goes Kabrumble. At the time of writing, this is the biggest thing I have printed out on the 3D printer. I started printing out the basics. I had to change the base layer on the printer to “Raft” which creates a layer or material beneath the actual printed parts. Without this, the print wasn’t working right and didn’t want to stick. I’m still learning 3D printing, I’m sure there are other ways to get the print to adhere better to the plate, feel free to comment below. After the above parts printed OK, I printed the rest of the items. As you can see, I ran out of grey filament and switched to white. I like the white, it takes less coats of paint to get the right shades I’m looking for. I now needed to find somewhere to put the shed. Out came the dremel and I removed 2 sections of track, then removed the ballast. I wanted the floor of the engine shed to resemble concrete so I fired up the Laser Cutter and created sections of “Concrete” from 2mm plywood. These were airbrushed and weathered with some powders to give the effect of age and dirt. With the “Concrete” floor laid, it was time to glue the frame of the shed in place. In this picture you can see the roof on. It’s only lying on the frame. I want to make the roof removable because I’m sure I’ll end up detailing the inside at some point. The shed is now glued in place. Here I am test fitting an LED lamp I got off eBay. …and here is the elevated platform for the maintenance crew that will be placed inside the shed, fresh off the 3D printer. Back in Tinkercad I created some roller shutter doors for the maintenance shed. 25 minutes later hot off the 3D printer here they are test-fitting into the doorways. Next, I airbrushed the doors black on both sides, when that was dry I cut 5mm strips of painter’s tape and stuck them on, then gave multiple coats of yellow to create the “Wasp Effect” While making the shutter doors I also 3D printed the access door. I’m not quite sure what colour to paint this. There is so much grey all over the diorama. In the picture above you can also see the workbenches also 3D printed. I think the maintenance shed doors turned out well. I still need to “weather” them down a bit. I fitted the dirty windows on the maintenance shed and started to “weather” the building with some Vallejo Grime Wash. I’m impressed with the grime wash. I was trying to get this colour correct and was failing. It’s finished… …well, is any model ever finished? To prove to myself that I actually could finish a model, I did this today. Glued the roof sections together Painted the inside of the roof black for light bleed Glazed all the windows and the skylights with clear plastic. Re-jigged an old Dell PC power supply to work without being plugged into the motherboard. Stuck copper tape underneath the board and soldered wires Set up the step-down voltage transformer to go from 8v to 3v so I don’t have to bugger around with resistors. Fitted 2x overhead LEDs inside with custom 3D printed brackets, and 2x LEDs that overhang the entrance Wired all the LEDs up 3D printed some new skylight frames for the roof. Painted them with grime. (still drying, so not installed) I got the roof on. I used thin strips of sticky back velcro to keep it in place. …and finally, some shots of the finished shed. This was a fun build to do, I’m very happy with how the 3D printer performed for this model, and considering the Walthers model is $43 (33GBP) and I spent about $3.00 in plastic filament, I would say that’s a win.
OO Scale PortaKabin

The humble PortaKabin as seen across many railway yards and stations across the UK. You can buy the 3D printer file for this model by clicking here. Often a bastion of British workers’ breakrooms, with a paraffin heater and a stained Formica-topped table with several chipped mugs, an electric kettle, a huge box of tea bags, a pound bag of sugar and a dubious bottle of milk with the tinfoil cap stuck back on the top. The PortaKabin was the refuge from the cold and rain where you could get a hot brew while the rainwater puddled on the Lino-covered floor from your boots. I remember the overwhelming heat and smell of these in winter and again the overwhelming heat in summer with the little hopper windows all open not making a blind bit of difference to the temperature inside. Working from the many images on the Internet I created a simple version in Tinkercad, 4 walls, a roof, and a floor. About 30 minutes later the 3D printer churned out the parts. Into my makeshift spray booth. AKA a cardboard box, painted in a mix of sand yellow, dark earth, and grey. Here they are stacked on the Diorama awaiting the windows and doors to be fitted. After the PortaKabins sat on the Diorama for a while I decided I didn’t like the colour. I resprayed them a light grey, and then finished off the support/stacking bars in black. As you can see, after painting them, the 3D print lines are more pronounced. I will probably re-print these in resin. I 3D printed it again in resin OK, I had to do it. I sent the file to my Resin 3D printer. The difference is night and day. It’s not painted yet, but it’s been over 42C here this week (109F) and it’s just too hot to be in the garage. Latest updates… OK, I know. I can’t make my mind up. With the ones I printed on the resin printer, I painted them “beige” I still have more to do with the windows, doors, and detailing.
OO Scale Workshop – 3D Print
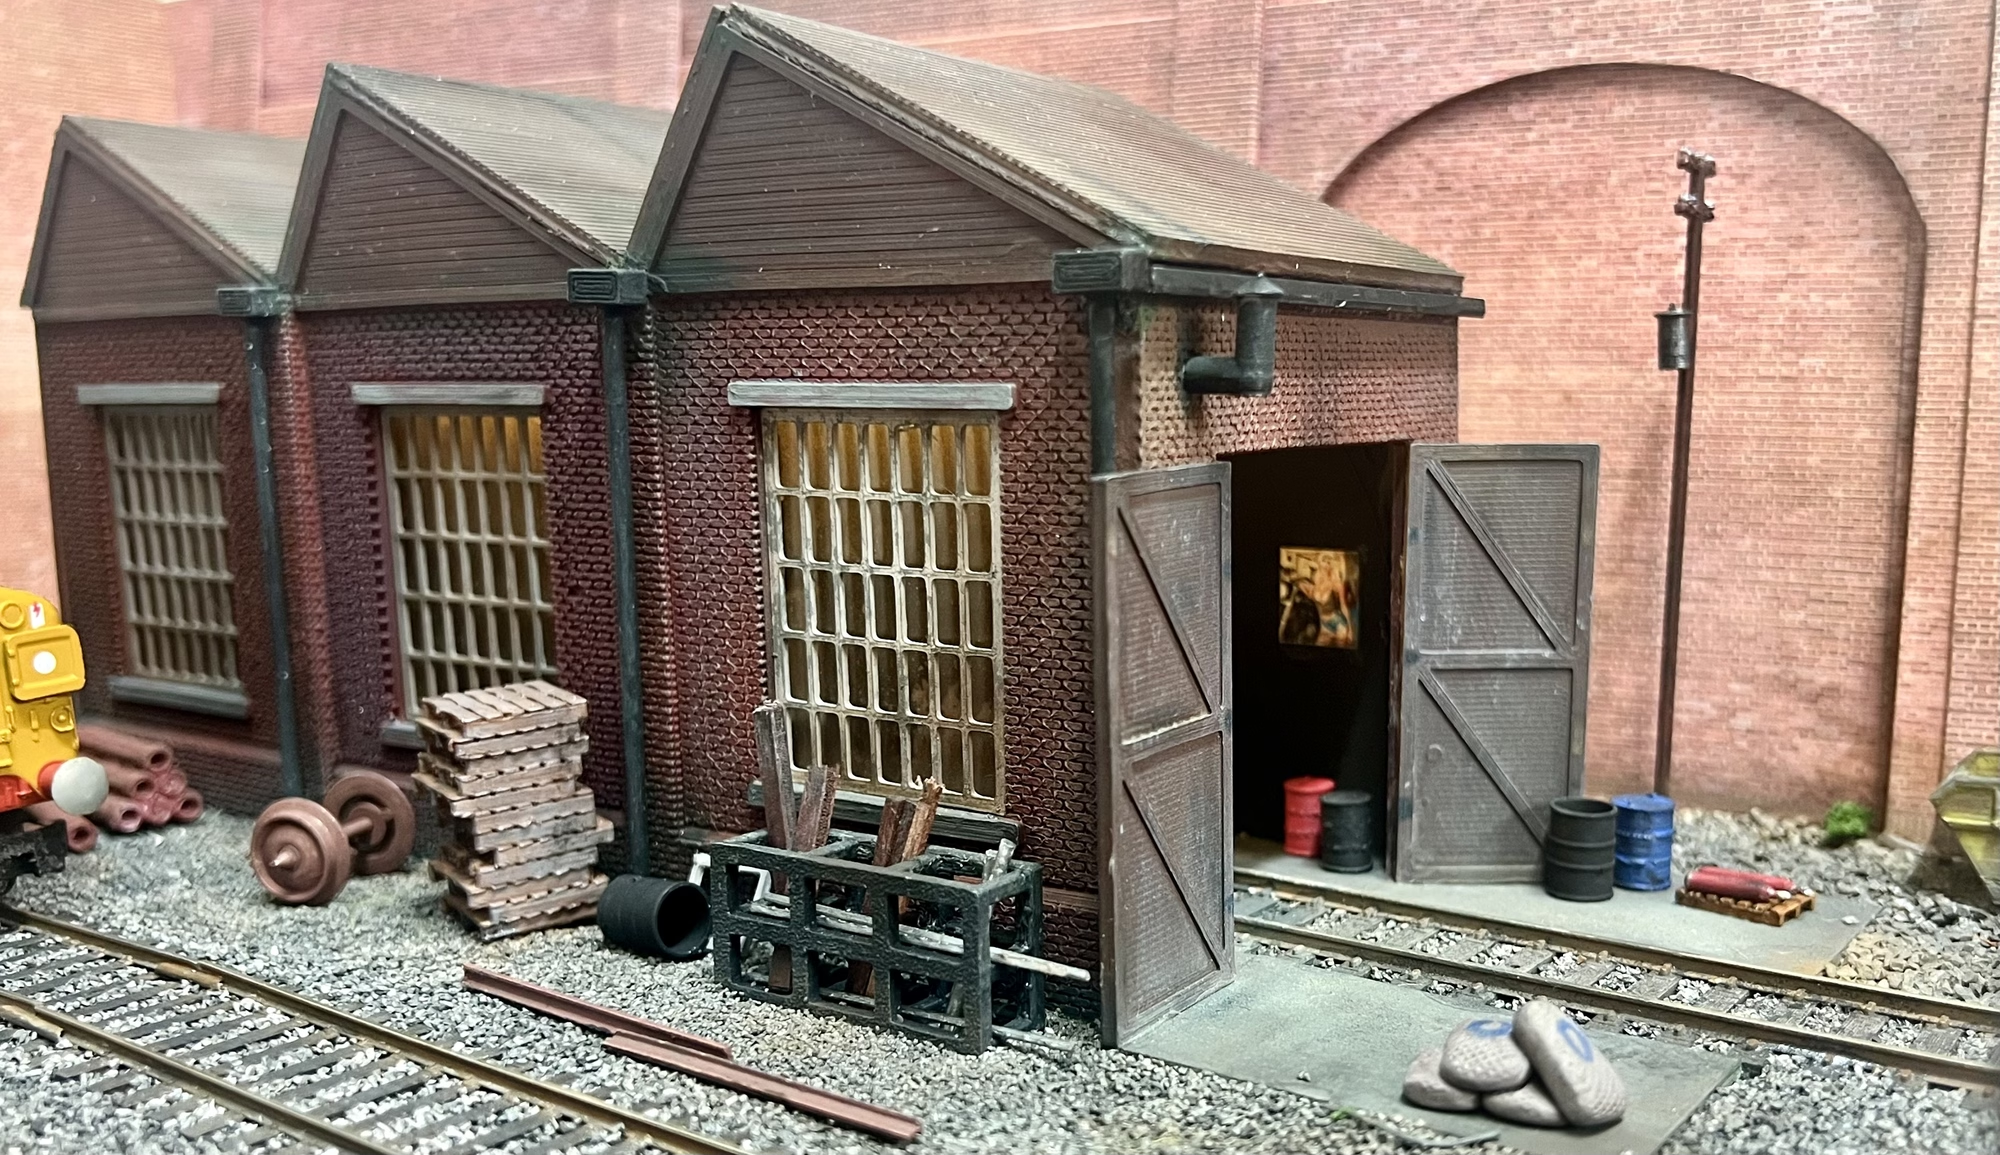
OO Scale Workshop – 3D Print I needed something to break up the expanse of brick wall on the side of the Diorama. A few weeks ago I had 3D printed a low-relief warehouse which I didn’t end up using. After a bit of faffing about with some cardboard to get the dimensions right, I came up with the idea of turning the warehouse into a OO Scale Workshop to place on the rail yard diorama. The original 3D print was only about 25mm deep. So I had to create new roof panels and the north light glazed section. I 3D printed 3 sections for the OO Scale Workshop and spray painted them brick red. I will need to tone down the colour a bit. The back wall of the workshop is not going to be visible, so instead of using up a lot of plastic filament to print the wall, I created a version of the wall in Inkscape and sent the file to the Laser Cutter which was cut out in 2mm plywood. Here it is painted grey. I painted it on this side because you will be able to see the inside through the windows. Below you can see the brick wall after I had toned the red paint down with a mix of grey and beige paint forced into the mortar joins then wiped off the brick face. Finally, I used weathering powders to create a varied look to the brickwork. Test fitting the roof sections. For the North Lights I used the Laser Cutter and for the roof section, I 3D printed. Fitting It All Together With all the walls and roof sections fitted to this OO Scale Workshop, it was time to install the glazing. This was glued on the inside of the windows using scraps of clear plastic taken from packaging containers. In the next set of pictures, you can see the workshop is nearly complete. After filling the gaps and repainting where needed, I used the airbrush to apply Vallejo grime wash. The workshop is now glued to the base board, the next thing is to scatter with Woodland Scenics ballast. OK, that’s done, when it’s dry I will make it dirty like the rest of the yard. …and before I glued the workshop in place, I added a couple of LEDs. You can see in these pictures I’ve started to dirty the ballast around the OO Scale Workshop. I now need to work on the rain gutters, downpipes and making the doors look a bit more realistic. Update on the Workshop. I think I’m nearly finished with this. I added the rain gutters, painted the window lintels and used a little more weathering powders to tone it down. The bits and bobs, details items and general crap bring it to life. The oil drums, water pipes, telegraph poles and the racking are all my own 3D print design. If you’re interested, you can obtain them here. Everything you see on this workshop model was 3D printed. I’m really happy with how this came out. Here are a few more pictures.
3D Printing For Model Railroading
Is 3D Printing Right For Your Layout? I know this technology isn’t everyone’s thing, but stick with me for a minute. 3D Printing has been around for a few years now. The machines have reached a price point that is attainable for a lot of people. Yes, I know $250 (£192GBP) is still a lot of money, but considering that a single plastic kit can be over $60 (£46)…. This Walthers Engine Shed Costs $55 (£43) If you buy between 4-5 kits similar to this, you’ve paid for the 3D printer. Then when you add the cost of all the other detailing parts, you will have covered the cost easily. Here’s another example. This Bachmann Coach Washing Plant retails in the UK for £35GBP ($45) I created my own version in Tinkercad and 3D printed this: (I haven’t finished detailing it yet, but you get the idea) The plastic filament cost me about $3 (~£2.30) That’s not modeling. …I know there will be a lot of modelers who will be shouting at the screen saying something like: It’s not real modeling. I make everything out of household rubbish and coffee stirrers from Starbucks. It’s elitist nonsense. ..and that’s OK, rule number 1 applies. But for those of you who are considering this exciting new aspect to the hobby, hopefully, this post will give you some food for thought. Here’s my view. Everything changes, nothing stands still. I know a lot of us build layouts that re-create a certain period in time, but I don’t have to use tools from the 1970’s to create a 1970s-themed layout. This hobby like many hobbies is struggling to attract new blood. Buggering about soldering, sawing, painting and general “tinkering” to a lot of people is just too much hard work. They can sit in front of a TV and have very realistic simulations and games that trigger neural endorphins that watching a Class 8 diesel go around a circle just cannot. (well, to most people anyway) 3D printing is here to stay and I think it’s a fantastic addition to the tools and processes that I use in this hobby, and maybe, just maybe, it could attract someone into the hobby. Types of 3D Printers There are basically two types of 3D printers. Filament and Resin. Here is a simple explanation of the difference between the two types. Filament 3D Printers (FDM/FFF): This is the model of the Filament printer I own. I can state that it’s REALLY easy to use and gives great results. Check out the structures, custom parts and detailing items I’ve created on this 3D Printer. US Amazon Link: https://amzn.to/3YbMpKH – Material Used: Plastic filament (like a thin string of plastic). – How It Works: The printer heats the filament and extrudes it through a nozzle, layer by layer, to build the object. – Common Uses: Larger, less detailed objects, like prototypes, parts, and simple models. Resin 3D Printers (SLA/DLP): This is the model of Resin printer I have. It creates incredibly detailed items. US Amazon Link: https://amzn.to/3zJ27TA – Material Used: Liquid resin. – How It Works: The printer uses a light source (like a laser or UV light) to harden the resin layer by layer, creating the object. – Common Uses: Smaller, highly detailed objects, like miniatures, jewelry, and detailed models. In summary, filament printers use heated plastic to build objects, while resin printers use light to harden liquid resin into detailed shapes. The great thing about 3D printers is that if you can think it, you can pretty much create it. 3D printing has become a valuable tool in model railroading, offering a wide range of applications to enhance layouts and rolling stock. Here are 10 examples of how 3D printing can be used in model railroading: Custom Rolling Stock: – Create unique freight cars, passenger cars, and locomotives that aren’t available in commercial kits. Detailed Scenery Elements: – Print intricate buildings, bridges, and other architectural structures to enhance the realism of the layout. Track Components: – Produce custom track pieces, switches, and crossings tailored to specific layout needs. Locomotive and Car Parts: – Manufacture replacement parts for damaged or missing components of locomotives and rolling stock, such as couplers, wheels, and handrails. Figures and Accessories: – Print detailed figures of people, animals, and other accessories to populate the layout and create realistic scenes. Unique Terrain Features: – Create custom terrain features like mountains, tunnels, and rock formations that fit perfectly into specific layout sections. Signage and Signals: – Produce custom signs, signal posts, and other railway signaling equipment to match specific prototype or fictional designs. Scenic Details: – Print small scenic details like benches, street lamps, fences, and other urban or rural fixtures that add depth to the scene. Stationary Equipment: – Create detailed stationary equipment such as cranes, water towers, and fuel tanks, adding authenticity to industrial or maintenance areas. Prototyping and Testing: – Use 3D printing to prototype new designs and test them before committing to final production, allowing for adjustments and improvements. These examples demonstrate the versatility and potential of 3D printing to customize, repair, and enhance model railroad layouts and equipment. This is a real example of something I have 3D printed on my layout.
OO Scale Rolling Stock / Coach Washing Station

What self-respecting rail yard would be complete without somewhere to wash the rolling stock? Whether it’s coaches, wagons, diesel locomotives or DMUs, This OO Scale “Coach Washing Plant” would be similar to what would be seen in Motive Power Depots or maintenance depots around the UK. Armed with pictures from the Internet and a desire not to spend £53 GBP/$68 USD on the Bachmann version, I fired up my favourite 3D imaging program on the PC. Tinkercad. Yes, I know it’s basic, but it really does what I need for now. At the time of printing this, it was the biggest/tallest thing I had printed and I was worried about lateral shift. I made sure to re-level the print bed before starting, and after about 3 hours I was very happy with the results. The sub-floor section was printed separately, I took the visual cues from the Bachmann model. The model was airbrushed in a variety of greys and weathered with grime. I then added the water pipes… …and installed the separately printed top section that houses the brush spindles and the water pipes. This was a really easy 3D Print. All I have to do now is install the “brushes” I made them from cut up pieces of “J-Cloth” Google that one my US friends.
3D Print Scale Converter
How To Convert From One Scale To Another Do you need to convert your 3D model from HO to OO scale, or US N scale to UK N scale? …or any other scale from one to another? It’s laughably simple… How it works… All 3D prints have to be analyzed and processed before sending to the 3D printer. This is performed by something called “Slicer” software, there are several different types, but each 3D printer comes with a version you can use. This software can do many things and one of them is “resizing” the 3D model. This can be used to transform from one scale to another. Example – I have bought a 3D print model of a lineside hut. It has been designed in HO scale but I model in OO scale. The 3D printer slicer software can re-scale the model to the scale of your choice and it’s really simple. Have a look at the table below that shows popular scales and the “scale factor” needed by the slicer software. Taking my example, my “source” scale is HO, and my “target” scale is OO. If i look down the first column and find HO, then read across to find the OO column, I can see the scale factor is 114.2% That is the number I will plug into the slicer software to transform the model from HO to OO. Scale Conversion In Pictures Here is a real-world example in the Elegoo CURA software I use. Here is a tunnel portal I created in OO scale. Let’s assume we want to convert that to HO scale. In the Slicer software I click on the “Change Scale” icon, in CURA it looks like this, it will be different in other software, but there WILL be a change scale option. All I do now is enter the “Scale factor” as a percent. Make sure you have the Uniform Scaling box checked. This will ensure that the percentage change is applied to all 3 dimensions of the model. You can see below that I’ve entered the OO to HO scale factor of 87.5%. You can also see that the dimensions have changed. The X axis under OO was 184.4 mm, under HO it’s now 161.35 mm. That’s it. It really is that simple. You now send the file to the 3D printer. It works for increasing or decreasing scale. Do You Want To Convert Other Scales? The table above shows the popular model railroading scales. What if you wanted to convert scales for Wargaming, Military Figures, Airfix Kits etc. ? You can use a Scale Calculator. If you want to jump right in and use a scale calculator, click the link below, it’s really easy to use. Link Here —-> Model Scale Calculator and Converter What is a 3D Print Scale Calculator? A 3D print scale calculator is a tool that helps you resize your 3D models accurately. By inputting the original dimensions and then the dimensions of the desired scale, the calculator provides the new dimensions, ensuring your model is scaled correctly. This is particularly useful when working with models that need to fit together or when converting designs to different scales for various applications. Why Use a 3D Print Scale Calculator? 1. Precision and Accuracy: Scaling models manually can be prone to errors, especially with complex designs. A scale calculator ensures that your dimensions are accurate, saving you time and material costs from potential mistakes. 2. Versatility: Whether you’re working on a miniature model, a full-scale prototype, or anything in between, a scale calculator can handle various scales and dimensions. This versatility makes it an indispensable tool for any 3D printing enthusiast. 3. Efficiency: Using a scale calculator streamlines the resizing process, allowing you to focus on the creative aspects of your project. It eliminates the need for tedious calculations and reduces the risk of errors How to Use a 3D Print Scale Calculator Using a 3D print scale calculator is straightforward. Here’s a step-by-step guide: 1. Choose Your Calculator: There are several online scale calculators available, such as those from Digital Taxidermy and Sanix3D. Select one that suits your needs. 2. Input Original Dimensions: Enter the original dimensions of your model. This could be in millimeters, inches, or any other unit of measurement. 3. Select Desired Scale: Choose the scale you want to convert to. For example, if you’re scaling a model from 1:100 to 1:50, input these values. 4. Calculate: Hit the calculate button. The calculator will provide the new dimensions, scale factor, and percentage change. 5. Apply the New Dimensions: Use the new dimensions in your 3D modeling software or slicer to resize your model accurately. Practical Applications 1. Model Railroading: If you’re a model railroader, a scale calculator can help you resize buildings, vehicles, and other accessories to fit your layout perfectly. 2. Miniature Gaming: For tabletop gamers, ensuring that miniatures and terrain pieces are to scale is crucial for a cohesive gaming experience. A scale calculator makes this task easy and precise. 3. Prototyping: Engineers and designers can use scale calculators to create prototypes at different scales, allowing for thorough testing and refinement before final production. Conclusion A 3D print scale calculator is an invaluable tool that enhances the precision, efficiency, and versatility of your 3D printing projects. By taking the guesswork out of scaling, it allows you to focus on what you do best—creating. So, next time you’re working on a 3D print, give a scale calculator a try and see how it transforms your workflow.
OO Scale Garage | Frank Tinley Autos

This OO Scale Garage aka “Frank Tinley’s Autos” is a scratch-built model based on the Scalescenes kit. It is very typical of the kind of thing you would see all over the UK. The term “Garage” is often used in the UK to mean “Mechanic/car repair workshop” or “Petrol/Gas Station” These were usually owned by someone in the community that everyone knew, and where everyone took their car to be repaired or “welded”. I’m laughing as I’m typing that, but it’s so true. My 1979 Austin Mini 1000 had a fair amount of “Welding” done to it. Frank Tinley was a mechanic (and a great guy) who worked in a building very similar to this in Southwell, Nottinghamshire. This model is a tribute to Frank, he taught me enough in the 1980’s to enable me to work on my own cars and motorbikes. Thank you, Frank!!! I bought the Scalescenes “Garage” a few years ago and based on those drawings, I came up with my own version in Inkscape. I sent the files to the Laser Cutter and then began to wrap the walls in Scalescene’s brick sheets. I also used textures from Textures.com I think they have stopped doing free downloads which is a shame. ScaleScenes papers used. Red Brick Aged Red Brick Concrete flooring Roads and pathways I didn’t really capture a lot of photos during the build. Barton’s Bus poster with “Pin Up” girl. It’s fascinating to think now that posters and calendars like this were plastered all over workshops and places of work. Nobody batted an eyelid. Imagine that today. The roof trusses were cut on the Laser too. Everything was cut on the Laser and wrapped in Scalescenes papers One thing I have started to do is use AI-generated images for some of the signs. I’m really happy with how these came out. Here is an example below. Once all the walls were together, I started on the interior. The fixtures and fittings are a mixture of items cut on the Laser and more recently items created on the 3D printer. The 3D printer is a new addition, more on that here. In this OO Scale Garage, the car lift, workbench, tyre rack, oil drums, pallets, tea chests and tyres were all printed on the 3D printer. Everything else was cut on the Laser. I had to finish all the interior before fitting the roof which was more Laser cut plywood wrapped in a roof texture from Textures.com The last thing I installed was a couple of small LEDs, one in the office and the other in the workshop. In these images, they are both running off about 8 volts, but I will get the office one on its own supply, 8 volts is too much for that space. 3 volts looks about right. It’s not finished yet. I still need to fit the side roller shutter door, and the back door, finish weathering the flat roof section, add some gutters, and more downpipes. Then generally weather and add some mossy green bits. Here are some pictures taken outdoors which always makes everything look better.
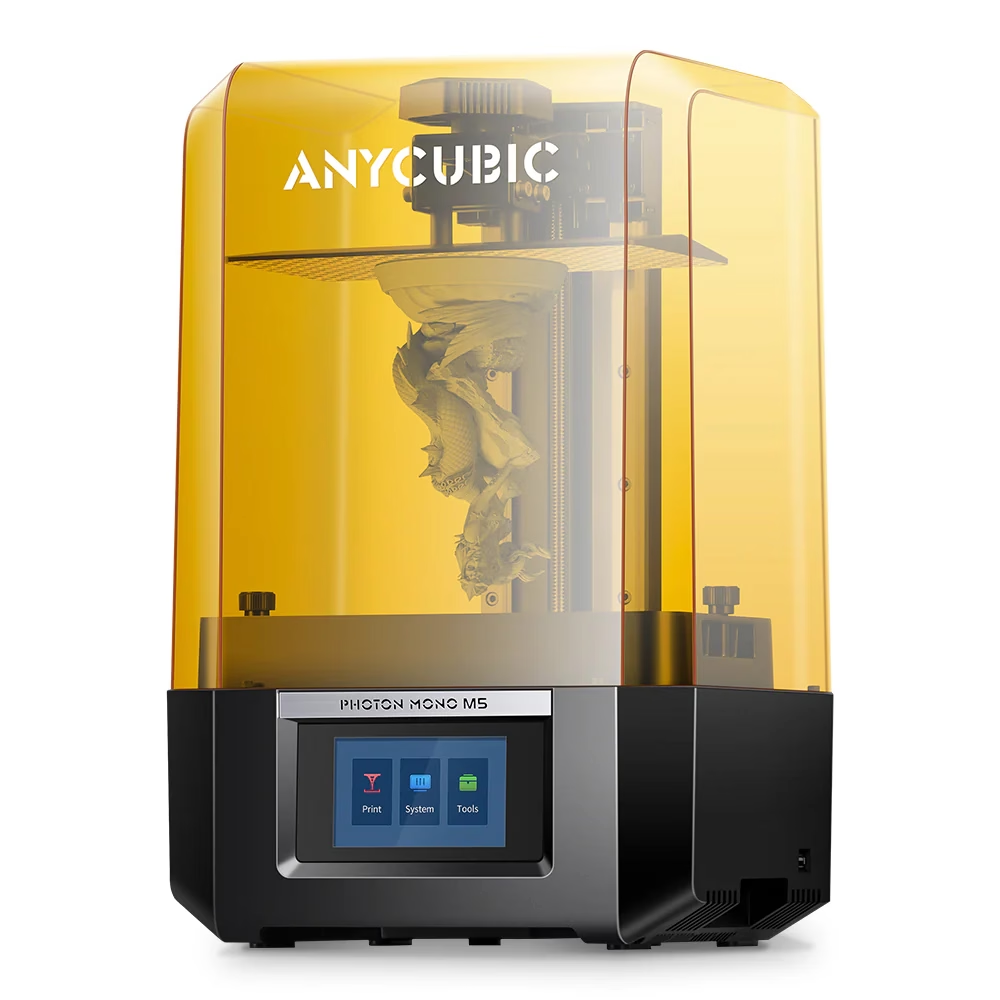
3D Printing On The Layout
3D Printing On My Layout I suppose it was inevitable I would end up with a 3D printer at some point. My work in technology and my hobby would cross paths eventually. I recently purchased two 3D printers. An FDM/filament type and a resin printer. Elegoo Nepture 4 Pro – Filament | Link https://amzn.to/3TLwwa3 Anycubic Photon Mono M5s – Resin | Link https://amzn.to/3PT86u1 What’s the difference? The FDM/filament is hands down easier to get going and work with, but the Resin printer has better quality and can do things the FDM/Filament printer just can’t. I’ve always liked the detail/realistic side of model railways, I love looking at some people’s layouts and admiring how realistic they look. This means I wanted to have a lot of “detail” items on my layout and dioramas. I started looking at some of the great products out there, then realised I would be spending a couple of hundred pounds. Nope. In the long run, I should make my own, and as I mentioned, I love technology so being able to bugger about with some new kit is a bonus for me. The banner image at the top shows some of the things I’ve knocked out in the last week. With anything new, there is a learning curve and I’ve realised what I can and cannot do. For detailing Frank Tinley’s Autos (Garage) the 3D printer has been great. Tyres, Oil drums, Pallets. Benches, Tyre Rack, Car Lift, Cabinets, Crates & boxes, all made on the Elegoo FDM/Filament printer. I know this might not be everyone’s cup of tea, but I’m really chuffed with how they have turned out. Most of the items I’ve created myself in TinkerCad. Yes, I know there are better programs out there, but for now, this works for me. Similar to my experience with the Laser Cutter, I can do things with this equipment that I just cannot do with my hands. Arthritis can be a bugger, but this way I can continue. I leave you with some more shots of my other 3D-printed items. Biffa bin, coal staithes, oil tank. Engine Shed Low Relief Office Building Tunnel Portal Buffer Stop Workshop